We are happy to share our photos and tutorials with anyone interested in spotlighting our crafts. Please be sure to link to our original posts and give us credit for our work. Thank you for your consideration and respect. We hope you enjoy our blog!


Showing posts with label Boredum Buster. Show all posts

Sunday, September 8, 2013

Dancing Colored Milk

My kids 'ooo-ed' and 'ahhh-ed' as they watched their dancing milk.   They would shout things like 'Look what color mine is now!' or 'Wow!'

And it was such an easy experiment and it opened up discussion as to why that is happening to the milk (so we did some research on the internet about it)

 photo Milkb_zps21d94d32.jpg

What You'll Need:
- A little container/dish/ or bowl

- A little bit of Whole Milk (you will need enough milk to cover a little bit more than just the bottom of your dish).  (skim milk won't work...this experiment has a lot to do with the fat content in the milk)

- Different colors of food coloring (liquid NOT gel food coloring)

- Liquid Dish Soap


The How To:
- First, fill your container with a little more milk than you would need to cover the bottom of it.

- Next, add a drop here and there of the food coloring of your choice to the bowl.  You can use as few or as many colors as you want.....just remember that too many different colors may produce a muddy color)

***Tip-  I found that this activity is best done on a surface that won't shake if bumped (we ended up doing this on the cement outside).***


 photo Milka_zps1b1839e2.jpg


 photo Milkd_zpsef3cd3f0.jpg


- Now comes the magic......add a drop of the liquid soap to the milk (if you are doing this with little kids, you may want to add the drop of soap for them.....we found that too much soap kinda ruins the dancing effect.


- Then sit back and watch your milk!


We had fun looking at the different patterns that would show up and the colors that would disapear and then reappear later.


 photo milke_zps58e3f85f.jpg


 photo milkf_zps31b7597f.jpg


 photo Milkc_zps5d6e0047.jpg


Honestly, these pictures don't do this activity justice!  But give it a shot with your kids!  Mine sure loved it!

Tuesday, January 22, 2013

Take along Ice skaters

You know how when you are at a restaurant or at the doctors office and the kids start getting restless and bored?
Well, here is a fun little toy that you can take along with you anywhere to help entertain them.
It fits in a mint tin.

And it is pretty easy to make.
Photobucket

What you will need:

- A mint tin (as in an Altoids mint tin or something similar)
- Computer and printer
- Pliers
- Paper clip
- Glue stick
- Magnets (note:  I had to use some fairly strong magnets for it to work well)
- Scissors


What to Do:
- First I did a search on the internet for an ice skater image that I liked.

- I had to resize it to about 1 1/2 inches

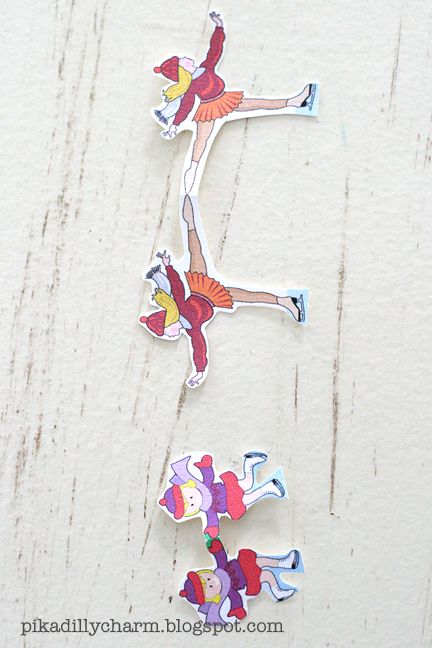
- Then I made a copy of the image and flipped it.....so it looked like a mirror image (shown in the photo below)

- I lined them up so that the edge of each ice skater was touching.

- Next print the ice skaters


Photobucket


-  Now its time to pull out those handy dandy scissors and cut them out.

-  Next grab your pliers and paper clip.

-  Take your paper clip and straighten out one end of it with the pliers. (After I straightened it I bent the very tip of it over to help reduce the risk of my kids accidentally getting poked by it.)

- With the other end of the paper clip use the pliers to twist it until it looks similar to the photo below.

- After twisting the bottom to look like below, try to make sure that it is flat on the very bottom of the paper clip...this is the part that will help keep the ice skater standing up.

Photobucket


- Now, fold your cut outs in half at the points where they meet.

- Then coat the inside of the ice skater with glue and place the straight end of the paper clip inside of each skater.
Photobucket


And that is pretty much it.

- When your kids want to play with it they stick the magnet(s) on the underside of the tin bottom (or lid) and the ice skaters on the opposite side. So they can guide them around from the underside of the tin.

- And when they are not playing with it just put the skaters inside of the tin and close the lid and stick it in your purse or pocket.

-And if you wanted to I'm sure you could use some scrapbook paper and modge podge to decorate the outside of the tin too.  =)

Photobucket


Photobucket

My kids love playing with this.  And since there are 2 ice skaters and a top and bottom to the container I chose, 2 kids can play together.

And the ideas with this are endless....

you can do ballerinas, cars, animals, bugs, dinosaurs.....


Have fun with this and if you have any questions feel free to ask away!

Monday, February 28, 2011

Mosaic

A beautiful and creative project using a few simple supplies.


What you'll need:

-Colorful Magazine Ads
-Scissors
-Glue
-Paper Plate or White Card Stock


The how to:

-Cut the colorful magazine adds into long thin strips, then clip those strips into small squares.


 -On the back of the paper plate/card stock,lightly pencil an outline of your pattern.
(Or wing it like I did)

-Then start gluing the squares into a beautiful pattern.


Friday, January 14, 2011

Winter Boredum- Buster

With all the snow that many people are getting right now, here is a great way to help the kids enjoy it.

Photobucket

What You'll Need:

- Spray Bottles or Squirt guns

- Buckets

- Water colored with food coloring

- Snow clothes
The How To:

- Dress in your snow clothes.

- Fill your buckets with colored water.

- Fill your spray bottles or squirt guns with the water

- Then 'paint' pictures in the snow!

Photobucket

Honestly, this was an activity that kept my kids busy for a couple of hours. They loved it!