We are happy to share our photos and tutorials with anyone interested in spotlighting our crafts. Please be sure to link to our original posts and give us credit for our work. Thank you for your consideration and respect. We hope you enjoy our blog!


Friday, January 24, 2014

A Kiss Countdown

Here is a fun way to count down the days until Valentines Day.  After all...who doesn't love to get kisses?

What You'll Need:
- A bag of Hershey Kisses
- 25 - 30 inches of Plastic Wrap (like Saran Wrap) Mine was 12 x27 inches long
- Twine or ribbon


The How To:
- First lay your piece of plastic wrap out on a table

- Then lay out two rows of 13 kisses on the plastic wrap.  (see photo 1 below)

- Now fold one side of the plastic wrap over the rows of kisses. And now fold the other side of the plastic wrap over the kisses. (see photo 2 below)

- Next, you will use your twine/ribbon to tie the plastic wrap into 13 sections.  2 kisses will be in each section. (see photo 3 below)

-Then you can embellish it with ribbon, hearts, or what ever you want (photo 4)
 I tied on a piece of twine that was long enough to allow me to hang the countdown on door knobs or coat hooks or whatever.

The countdown is meant to start on February 1st.

 photo KissCountdown1_zpsdbe3c124.jpg

 photo KissCountdown3_zpsa6708954.jpg

 photo KissCountdown2_zps68f6e249.jpg 

My kids are excited to start getting their 'kisses' each day.  =)

Monday, November 18, 2013

Turkey Feather Toss

Here's a fun game for the kids on Thanksgiving Day!

Turkey Feather Toss!


What You'll Need:
 -Craft Feathers
-Nails
-Tape


The How To:
Slide the nails inside the end of the feather if possible and tape it securely in place.  
If the nail can not be inserted inside the feather then tape it securely around the end.
(The nail adds weight to the feather, making it easier to toss.)

Find several baskets and cups for the children to toss the feathers into.
Have the children stand or sit some distance from the backets and have them 
throw them like darts.
Place point cards on the baskets and cups if you would like to keep score.
And toss away!

(Because there are nails in the feather do not leave your children alone while playing this game.)


Saturday, November 16, 2013

Where's Tom Turkey Game

Here is a fun and silly game for the family to play 
throughout the month of November!

Where's Tom Turkey?


Here's how to play:

Buy or make a turkey that is small enough to hide but large enough to be found. 

Take turns hiding Tom the turkey in creative spots, doing creative things where
 others are sure to find him.  

The trick is being the first to find him!
 
Who ever finds Tom the turkey has the honor of hiding him the next day.  
It's really fun to see what silly things your family will have the turkey doing!
(Like raiding the candy jar or reading a book!)

Adapt the game to fit your individual family.
 (Keep score on the most turkey finds or have a family vote on the most creative turkey setup.)   
Make it your own and have fun playing - Where's Tom Turkey?


Sunday, September 8, 2013

Dancing Colored Milk

My kids 'ooo-ed' and 'ahhh-ed' as they watched their dancing milk.   They would shout things like 'Look what color mine is now!' or 'Wow!'

And it was such an easy experiment and it opened up discussion as to why that is happening to the milk (so we did some research on the internet about it)

 photo Milkb_zps21d94d32.jpg

What You'll Need:
- A little container/dish/ or bowl

- A little bit of Whole Milk (you will need enough milk to cover a little bit more than just the bottom of your dish).  (skim milk won't work...this experiment has a lot to do with the fat content in the milk)

- Different colors of food coloring (liquid NOT gel food coloring)

- Liquid Dish Soap


The How To:
- First, fill your container with a little more milk than you would need to cover the bottom of it.

- Next, add a drop here and there of the food coloring of your choice to the bowl.  You can use as few or as many colors as you want.....just remember that too many different colors may produce a muddy color)

***Tip-  I found that this activity is best done on a surface that won't shake if bumped (we ended up doing this on the cement outside).***


 photo Milka_zps1b1839e2.jpg


 photo Milkd_zpsef3cd3f0.jpg


- Now comes the magic......add a drop of the liquid soap to the milk (if you are doing this with little kids, you may want to add the drop of soap for them.....we found that too much soap kinda ruins the dancing effect.


- Then sit back and watch your milk!


We had fun looking at the different patterns that would show up and the colors that would disapear and then reappear later.


 photo milke_zps58e3f85f.jpg


 photo milkf_zps31b7597f.jpg


 photo Milkc_zps5d6e0047.jpg


Honestly, these pictures don't do this activity justice!  But give it a shot with your kids!  Mine sure loved it!

Sunday, August 11, 2013

Glass Mushrooms

So here is a super easy way to add some fun to your garden.

Glass mushrooms!


What You'll Need:

-  Glass vases or goblets from your local thrift store

-  Glass bowls from the thrift store 

-  Glue meant for glass (I found some at my craft store)


 photo GlassMushroom_zpsde79c3a2-1.jpg


The How To:
-  First read the instructions on how to apply and use the glass glue that you purchased

-  Then put the glue on the rim of the vase or goblet

-  Now center the bowl on the top of the vase/goblet and let the glue dry according to package directions.

-  Let it dry for the amount of time indicated on on the glue package.


That's it!  

Now find that perfect spot in your garden to display your mushrooms.  =)

 photo GlassMushroom2_zps63a35a1d-1.jpg

Wednesday, February 13, 2013

Meringue Hearts

Meringues are easy to make and taste delicious!

 photo MeringuesHeart_zps02c378ea.jpg

This recipe makes about 60 meringue cookies (but we gobbled them up in a day or 2)

What You'll Need
- 4 Egg Whites
- 1 tsp Vanilla
- 1/4 tsp Cream of Tartar
- 1 1/3 cups Sugar
- Food coloring (optional)
- cake decorating icing bag


The How To
- Preheat the oven to 300 degrees.

- In a medium mixing bowl you are going to beat the Egg Whites, Vanilla, and Cream of Tartar on high until SOFT peaks form. (that is where the tips curl)

- Then add the Sugar....ONE Tablespoon at a time.

- Now you need to beat the mixture until STIFF peaks form (that is where the tips stand straight up)

- Next if you want to color your meringue, nows the time to add food coloring until you get your desired color.

- Then fill the cake decorating bag with the meringue mix.  I did NOT put a decorating tip on the bag.

- Now to put your hearts on the pan.  For each heart, squeeze the meringue on to the pan in a V formation....making sure that the lines of the V touch. 

-Time to stick them in the oven and bake them for 20 minutes (until they are firm and the bottoms are lightly browned)

- Put your meringues on a cooling rack.

- When cooled off....ENJOY!!!

Tuesday, February 12, 2013

Fruity Soap


 photo soapg_zpsa7a2f659.jpg

What You'll Need:

- Clear pure glycerin soap (I found mine at my local craft store)

- Silicone muffin pan

- Pureed fruit, herbs, or berries of your choice


The How To:

 - First puree (or zest) your ingredients.


 photo soapb_zpsa58fe8cd.jpg


- Next, melt your pure glycerin soap according to the directions on the package.

*Note: I melted 8 blocks of my soap and it gave me 11 small soaps.

 photo Soap_zps7d0a0c39.jpg


- Now it is time to mix your different fruits/herbs/berries into the melted soap.  Be sure to start with adding small amount at first (like a teaspoon of the fruit/herb/berries at a time) until you get the desired consistency and/or color.

- Then pour/spoon it into the muffin pan.  (I put 2 Tablespoons of soap into each muffin slot)


 photo soapc_zps8fdaf093.jpg


- Let you soap cool according to the package directions (probably a couple of hours) until it is hardened.

- Next pop the soap out of the silicone muffin pan and, waalaa, you have some fruity smelling soap.


Oh and be sure to use it within a couple of months.
 photo soapf_zps7ee2d6c5.jpg

Some of the different things i tried in my soaps were: lemon, strawberry, mint.  Then a couple of combos of the above: lemon + strawberry, mint + strawberry
 photo soaph_zps93e1c685.jpg


Since Valentines is right around the corner I think my girls would think it would be fun to each get their own heart shaped fruity soap.

Wednesday, February 6, 2013

Pom pom Garland

Pom Pom garlands are super easy to make.
In fact they are a great way to use up left over yarn.

 photo pompom8_zps9d989d8d.jpg


What You'll Need:
- Yarn
- Fork (Mine was a larger salad serving fork so I could get larger pom pom's)
- Scissors
- String to hang them on (I used bakers string/twine)
-Needle or scotch tape ( for threading the pom pom's on the string)


The How To:
- The first thing you'll need to do is wrap your yarn around the fork about 60-65 times, then cut the yarn.

 photo pompom_zpsbcea1f5b.jpg


- Now cut a longer piece of yarn (I did mine around 5-6 inches long).

 photo pompom2_zps2d2ced89.jpg


- Then take that 5-6 inch piece of yarn and thread it through the bottom of the middle gap in the fork.

 photo pompom3_zps84738b0f.jpg


- Then tie it tightly around the middle of your bunch of yarn (shown in picture below).

 photo pompom4_zpse5c26b92.jpg


- Now, slide the yarn off the fork.

- Then take your scissors and cut through the loops that are on the edge of your yarn 'ball'.
  Keep cutting until all the loops are cut.

 photo pompom5_zps26e32c02.jpg


 photo pompom6_zps56adbcb7.jpg


- After you cut all the loops feel free to give the ball a little 'hair cut' and trim any long pieces off and trim it up so it looks more even.

- Repeat the steps above until you have the desired amount of pompom's.

- Next thread your needle on your string (for thicker string using a yarn needle may be easiest) or tape the end of your string to make it so you can string your pompoms on the string.

- Now just poke the needle (or taped end of your string) through the center of your pompom's.

- You are now ready to hang your pompom garland!

 photo pompom8_zps9d989d8d.jpg

Tuesday, January 22, 2013

Take along Ice skaters

You know how when you are at a restaurant or at the doctors office and the kids start getting restless and bored?
Well, here is a fun little toy that you can take along with you anywhere to help entertain them.
It fits in a mint tin.

And it is pretty easy to make.
Photobucket

What you will need:

- A mint tin (as in an Altoids mint tin or something similar)
- Computer and printer
- Pliers
- Paper clip
- Glue stick
- Magnets (note:  I had to use some fairly strong magnets for it to work well)
- Scissors


What to Do:
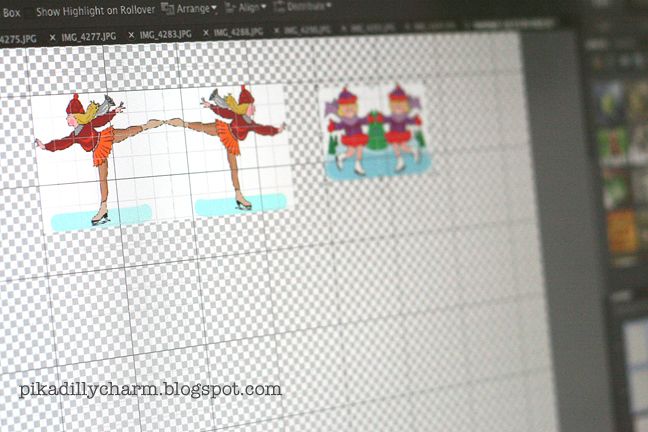
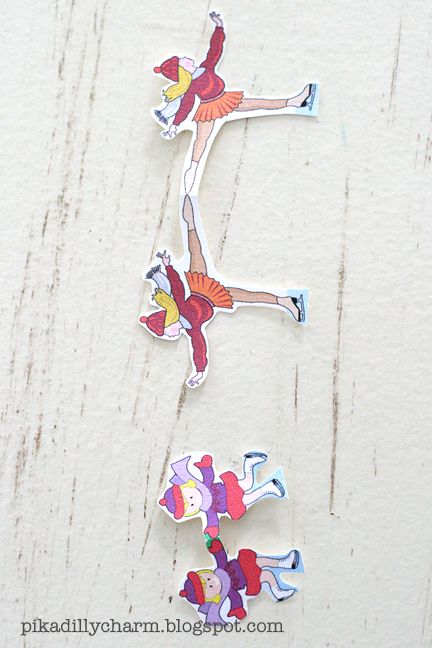
- First I did a search on the internet for an ice skater image that I liked.

- I had to resize it to about 1 1/2 inches

- Then I made a copy of the image and flipped it.....so it looked like a mirror image (shown in the photo below)

- I lined them up so that the edge of each ice skater was touching.

- Next print the ice skaters


Photobucket


-  Now its time to pull out those handy dandy scissors and cut them out.

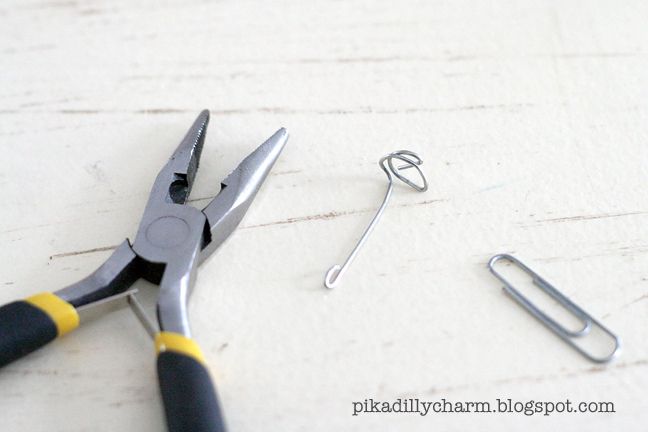
-  Next grab your pliers and paper clip.

-  Take your paper clip and straighten out one end of it with the pliers. (After I straightened it I bent the very tip of it over to help reduce the risk of my kids accidentally getting poked by it.)

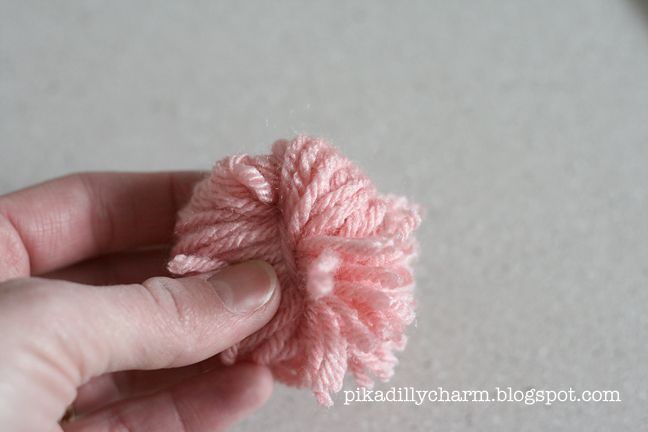
- With the other end of the paper clip use the pliers to twist it until it looks similar to the photo below.

- After twisting the bottom to look like below, try to make sure that it is flat on the very bottom of the paper clip...this is the part that will help keep the ice skater standing up.

Photobucket


- Now, fold your cut outs in half at the points where they meet.

- Then coat the inside of the ice skater with glue and place the straight end of the paper clip inside of each skater.
Photobucket


And that is pretty much it.

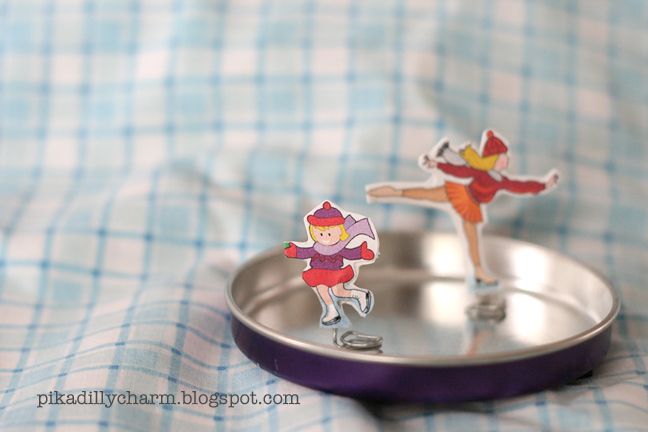
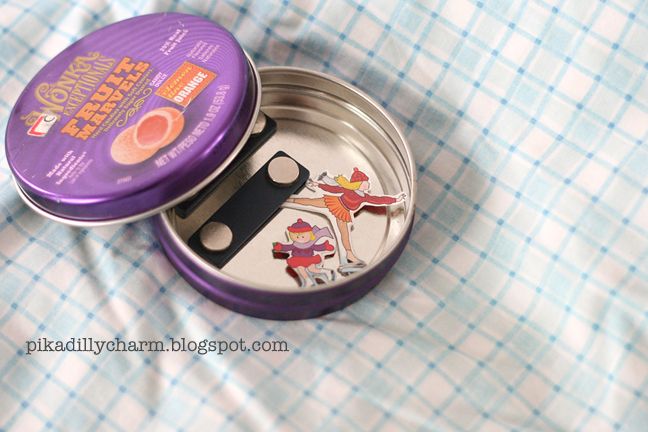
- When your kids want to play with it they stick the magnet(s) on the underside of the tin bottom (or lid) and the ice skaters on the opposite side. So they can guide them around from the underside of the tin.

- And when they are not playing with it just put the skaters inside of the tin and close the lid and stick it in your purse or pocket.

-And if you wanted to I'm sure you could use some scrapbook paper and modge podge to decorate the outside of the tin too.  =)

Photobucket


Photobucket

My kids love playing with this.  And since there are 2 ice skaters and a top and bottom to the container I chose, 2 kids can play together.

And the ideas with this are endless....

you can do ballerinas, cars, animals, bugs, dinosaurs.....


Have fun with this and if you have any questions feel free to ask away!

Tuesday, January 15, 2013

How to Draw Snowflakes!

 Learn how to draw beautiful snowflakes of your own.
These snowflakes were created by the artist at 'Profusion Art.'

Check out the tutorial at profusionart.blogspot.com

Thursday, December 13, 2012

Children's Christmas Apron

Here's a cute and easy way to make a holiday apron for children! 


 All you'll need is a kitchen hand towel and ribbon.


You can find holiday hand towels in almost any store during the holidays.


-Fold the towel in half lengthwise.
-Then take a ruler and measure 3 1/2 inches in on the top and mark it. 
(Make sure it's not on the folded side)
and 9 inches down the side and mark it.  (See picture above)
(Although my towel is not folded in half it shows you where your cut's should be made.)
-Next take your ruler and trace a line from the two points you marked. (like the picture above)


-(Your towel should still be folded in half.)  Now cut the towel on the line that you marked. 
-Open it up.  Your now ready for your sewing machine.
-Fold the cut edges over about a 1/4 inch. twice to hide the rough edges and pin in place.  
-Next pin your ribbon in place for the neck and the ties around the back. 
-Sew in place.


And that's all there is too it!  Easy as pie!  Now your ready to let your children help you make some!


Happy Baking!


Wednesday, December 5, 2012

12 Days of Christmas Cupcake Tin

Here's a fun way to celebrate the 12 days of Christmas!

First measure the mouth of the cupcake tin to see how wide you need to make each opening.  Have  a lip no less than 1/8 an inch around each tin or it will not give the magnet enough area to hold itself in place.
(Each circle needs to be 1/4 inch bigger than the opening.  That's 1/8in. + 1/8in for each side.)


Cut your circles out of scrapbook paper.  Add any embellishments that you like, then add the number.
Next stick each circle on a sticky magnet sheet.  (You can get these at the craft store.)  Then cut them out.
You can leave your cupcake tin silver or spray it white like mine.


 Next you need to choose what you want to put inside of each tin.  You can put in candy, fun messages, small gifts, activities to do as a family.  Oh the possibility!