We are happy to share our photos and tutorials with anyone interested in spotlighting our crafts. Please be sure to link to our original posts and give us credit for our work. Thank you for your consideration and respect. We hope you enjoy our blog!


Showing posts with label Thanksgiving Crafts. Show all posts

Wednesday, November 24, 2010

Finger Print Turkey Place Cards

What you'll need:
-White card stock
-Yellow, Orange, Red & Brown Paint or Stamp pads
-Googly Eyes

The how to:
-First start with the color Yellow, dip your finger in the paint and press it repeatedly on the card stock making a fan.

-Next use the color Orange and press your print over half of the yellow print. Repeat with the color Red.

-With the brown press a print in the bottom center of the fan.

-Glue two googly eyes and a small orange triangle for the beak on the brown print.

-Draw the feet and add a name.

Thursday, November 11, 2010

Thankful Banner

This Thankful Banner will help keep the feeling of 'Fall' this Thanksgiving!


What you'll need:
-Scrapbook Paper (Your choice)
Two - 8.5 x 11 (Printer size) (Mine is cream)
Two - 12 x 12 (Mine is Brown)
Four - 12 x 12 (Mine is leaf pattern)
-Glue
-Glitter
-Scissors or Paper Cutter
-Hole Punch
-Raffia
-Fall Leaves (Real or Fake)

The how to:

-Place your 8.5 x 11 Scrapbook paper in your printer and print out each letter.
Then cut into squares.


-Glue Letters onto second pattern paper and cut, leaving a 1/4 inch border around each letter.


-Glue each letter onto third pattern paper and cut, leaving at least a 1-2 inch. border.

-Once all backgrounds are cut out and glued together, trace each letter with a glue bottle
and fill in the center.


-Sprinkle glitter over glue and set aside to dry.


-Once letters are dry, punch holes in the top corners of each letter then punch holes about 1/4 inch. below the stem on each leaf.
(Leaves are coated with Mod Podge)


-Tie the corners and leafs together with Raffia.


-Once all the letters are tied together make loops for the ends and hang it up!

Tuesday, November 9, 2010

Glitter Pumpkins

This is an easy craft that will add a little sparkle to your holiday!

What you'll need:
-Mini pumpkin. (fake or real- mine are fake)
-Glitter (Your color choice)
-Mod Podge
-Paint brush


The how to:
-Pick your pumpkin.


-Paint a thick coat of Mod Podge all over your pumpkin.


-Place a paper plate or bowl under your pumpkin and pour glitter all over it. Fill in all white spots.


-Place pumpkin on wax paper and allow to dry.

-Touch up the bottom of pumpkin and any other exposed areas if needed.

-Once dry add a second coat of Mod Podge over the top of the glitter on the entire pumpkin.
This will dry clear and ensure the glitter will not flake off.


-Once Mod Podge is dry your pumpkins are ready to display!

Monday, November 1, 2010

Thankful Books

For the Family

Here is a great place for family members to keep a record of what they are thankful for.

Photobucket

What You'll Need:

-Card Stock or another kind of stiff paper

-Scissors

-Glue

-Needle and thread

-paper

-Buttons, stamps, or other things to decorate the cover of the book.

The How To:

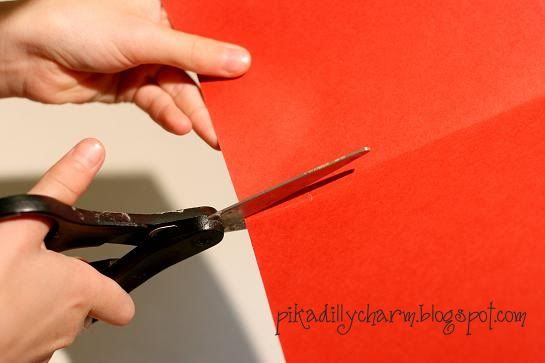
-First you will need to decide how big you want your book and cut it to the desired size. Then fold it in half

Photobucket


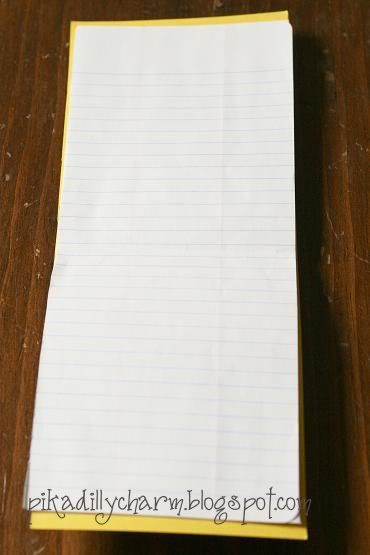
-Next decide how many pages you want in your book. Then cut your pages to the length of the book when it is open.

Photobucket


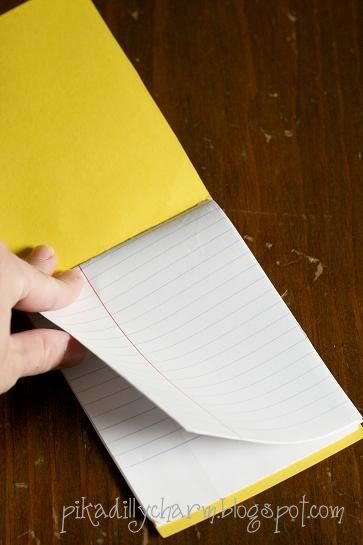
- After that, fold the inside pages in half.

Photobucket


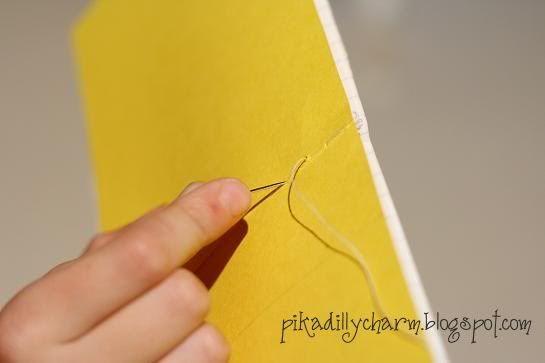
- Then thread your needle and sew down the 'spine' (the middle) of the book to hold all the pages in.

Photobucket


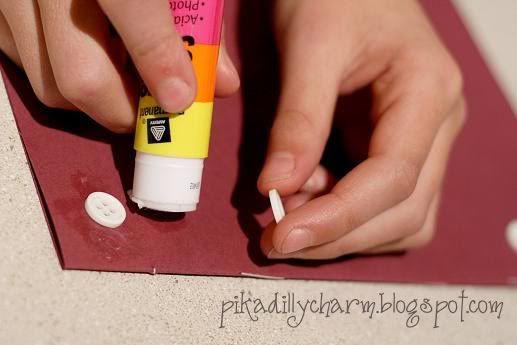
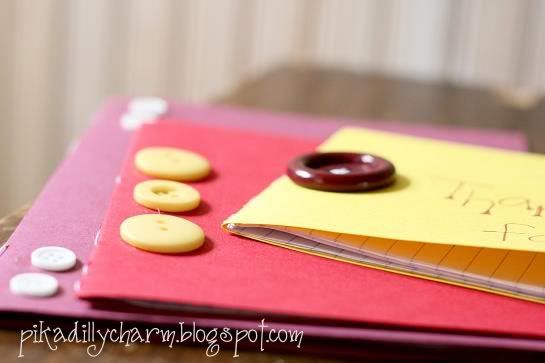
-Next comes the decorating part. We used buttons and leaf stamps to decorate ours. Glueing the buttons on is easier than sewing them on for the younger ones.

Photobucket

And that's that! I am having my kids write down or draw something that they are thankful for at the end of each day into their 'I am Thankful' books until all the pages are filled.

Photobucket

Photobucket

It is a great way to help your family to remember what there is to be grateful for each and every day.

Saturday, October 2, 2010

Toilet Paper Pumpkin

Just For Fun

You'll find this a fun and easy way to start decorating for fall!

What you'll need:
-18x18 inch piece of fabric
-14x14 inch piece of quit batting
-Green felt
-Brown paper lunch bag

The how to:
-Place fabric right side down with batting centered on top. Place one toilet paper roll in center of batting. Wrap fabric around the toilet paper roll by stuffing the corners down the center of the roll.

-Next cut leaf shapes with long stems out of the green felt. (Using a plastic leaf or real leaf as a templet if needed) Stuff the leaf stems down the center of the tube.

-For the pumpkin stem roll up the brown paper lunch bag, starting from the short end and twist it. Stuff the stem down the center of the tube.