We are happy to share our photos and tutorials with anyone interested in spotlighting our crafts. Please be sure to link to our original posts and give us credit for our work. Thank you for your consideration and respect. We hope you enjoy our blog!


Showing posts with label Halloween Crafts. Show all posts

Wednesday, October 27, 2010

Jack O' Lantern Jug

Living Green
Light up your holiday decor with this delightful Jack O' Lantern!


What You'll Need:
-Empty Milk jug
-Orange, Black & Green Acrylic paint
-Mod Podge
-Raffia
-String of Lights

The how to:
-Rinse out jug with soap and water. Let it dry.

- Paint jug orange, and the top where cap screws on green. Turn upside down and allow to dry then give another coat of paint. Handel carefully. Paint will come off easily. Touch up any spots where paint has come off.

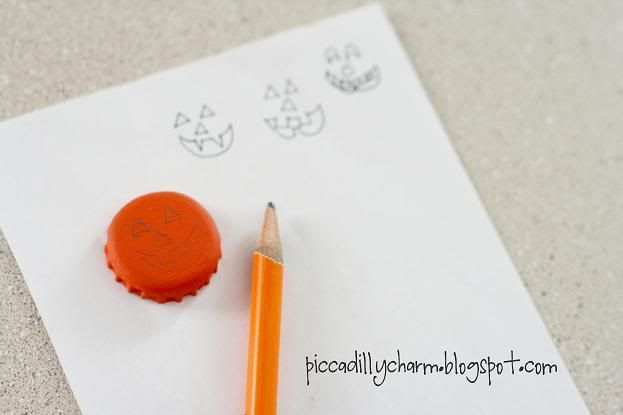
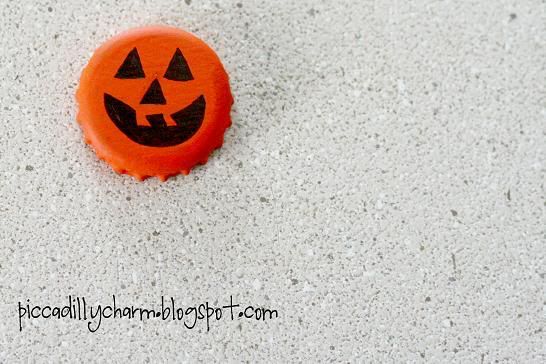
-Paint the face on the jug using the black paint.

-When dry, paint a generous amount of Mod Podge over painted jug. (For some added sparkle mix some fine glitter with the Mod Podge when painting) Balance upside down and let dry completely.

-Tie some Raffia around the top of jug and stuff some lights inside the through the opening in the top.

Make several of these Jugs and line you front porch or walkway with these Fun Jack O' Lanterns this Halloween!

Tuesday, October 26, 2010

Cheesecloth Ghosts!

Love It

These Ghostly Spirits will be a spooky addition to your Halloween decor.

What you'll need:
-Cheesecloth
-Googly Eyes
-Glue (white all-purpose glue)
-Plastic or paper cups
-Small Balloons (I used water balloons)
-Fishing Line
-Tape
-Scissors

The how to:

-Tape the bottoms of two cups together. Place a balloon in the mouth of the cup and tape it to the cup.

-Cut the cheesecloth in 12x12 inch. squares. (Each ghost will need two cheesecloth squares)


-Place one cloth in a bowl and squeeze glue over the top. Use your hands to rub the glue into the cloth, squeezing into a tight ball.
-Cloth only needs to be damp with glue not saturated. If you can squeeze glue out of the cloth there is too much.


-Gently unwad the cloth and drape it over the top of balloon.
-Repeat the process with the second cloth and drape it over the first cloth, arranging it so the long corners offset the corners of the first cloth.

-If corners of cloth hang to low simply trim with scissor. Allow to dry completely.


-When dry, hot glue the eyes in place and pop the balloon with a pin.
-Thread the fishing line through the top of the ghost and secure with a knot. It is now ready to hang!


Thursday, October 14, 2010

Spooky Halloween Garland

Spotlight
Check out this cute Halloween Garland Tutorial by Paper Crave!

Halloween Garland


To download these spooky characters and see the tutorial click here or on the picture.

Visit papercrave.com to see more Paper Crave projects.

Wednesday, October 13, 2010

Halloween Votives!

Living Green
These Halloween characters will add a spooky glow to your holiday!


What you'll need:
-Any size baby food jar
-Acrylic paint (Orange for Pumpkins, White for Ghost & Skeleton, Black for faces)
-Mod Podge
-Glitter
-3/8 inch Ribbon (Green for Pumpkins, White for Ghost & Skeleton)
-Raffia
-Hot Glue gun

The how to:
-Turn baby food jars upside down and paint twice, let each coat of paint dry before you start the next. Leave top part of the jar (where the lid screws on) unpainted.

-Carefully turn jars over and paint the face with black paint. Let dry.

-Turn jar upside down again and carefully paint a layer of Mod Podge mixed with glitter over all painted areas. (The amount of glitter is up to you) Let dry.

-Cut a length of ribbon that will fit around the top of jar and hot glue in place.

-Tie a few strands of Raffia around top of jar and tie in a bow.

-Place a tea light candle inside, light it. And you are done!

Tuesday, October 12, 2010

Home Made Window Stickers!

Tutorial
The sky is the limit with these cute window stickers!


What You'll Need:
-Fabric Paint
-Glue (white all-purpose glue)
-Glossy page protector
-Graphic image printout
-Paint brush

The how to:-Slide graphic printout into the glossy page protector. Outline the whole image with
the Fabric paint using more than one color if needed. Set aside to dry.


-When your graphic outline is dry, mix about 2/3 parts glue and 1/3 part fabric paint. Mix well.

-Using a paint brush, fill in the image with a generous amount of the glue/paint mixture. (almost overflowing)


-Set aside to dry overnight.


-Once dry, gently peel image off the page protector and place it on your window.

Saturday, October 9, 2010

Halloween Leggings

Just for Fun

I love leggings on my kids. And here is a way to turn a pair of adult size knee-highs in to leggings for kids and fingerless gloves.

Photobucket

What you'll need:

-Adult knee-high socks

-Fabric scissors

-ribbon (optional)

-pins(optional)

-sewing machine or needle and thread (optional)

The How to:

-First you cut off the foot of the sock. I cut mine right above the heel.

Photobucket


-You could leave them like that, but I thought adding some ribbon would be a nice touch.

Photobucket


-I pulled the sock tight as I pinned the ribbon on. And when I sewed it on I pulled it tight too.

Photobucket


-I only sewed one edge (the outer edge) of the ribbon to the sock.

Photobucket


And there you go! Since you pulled the sock tight when sewing on the ribbon, it gives a curl to the bottom of the leggings.

Photobucket

Photobucket


They can be worn all the way pulled up the leg. Slouched on the leg. Or they can even be worn on the arms!

Photobucket

So now that the leggings were made I didn't like the idea of tossing the foot part of the sock. So here is a quick and easy way to turn them into fingerless gloves.

The How to:

-Cut the toe off of the sock.

-Make a little cut/hole on the side of the glove where you want your thumb to stick out.

Photobucket


And, there you go! I didn't not hem or do any sewing on these. If you wanted a more finished look you could hem the edges and the thumb hole.

Photobucket

Wednesday, October 6, 2010

Toiletpaper Tube Mummys

Living Green

Photobucket


Here's what you need to make these spooooky mummy's out of empty toilet paper tubes. It is easy and kids would love to help create their own.

What you'll need:

-Empty toilet paper tubes (depending on how many you want to make)

-Packing Tape

-roll of 2 inch wide gauze (2 to 3.5 feet long per mummy)

-White paper

-Googly Eyes

-Glue

-Scissors

How to:
-Lets start by deciding if you want a short mummy or a tall one. If you want a taller one, you don't need to do anything to the empty toilet paper tube. If you want a short one, cut one of the tubes in half.

Photobucket


-Next we will be tracing the bottom of the toilet paper tube on the white paper. Each mummy will need one of these.

-After you trace it, cut out the circle and tape it to one end of the toilet paper tube.
-Then you will need to measure approximately a 2 1/2 foot strip of the gauze for the short mummy and around 3 1/2 feet for the tall one.

Photobucket


-After you have it measured and cut to the desired length you will tape on end of the gauze to the toilet paper tube.
-Then gently stretch and wrap the gauze around the toilet paper tube. You will want to twist the gauze every once in a while to add more demension to your little mummy.


-When you reach the end of the gauze tuck it under one of the other layers.
-Then glue the googly eyes on to your creation. And Wa-la! You have your little mummy.

Photobucket


You can even fill these little guys up with some Halloween goodies.

Photobucket

Tuesday, October 5, 2010

Halloween Magnets

Tuesday Tutorial

So here is a Halloween craft that uses bottle caps.

Photobucket

What you'll need:
-Bottle caps
-Paint (craft paint or spray paint)
-Cardboard
-Magnets (I used 3/4 inches circle magnets found at the craft store)
-craft wire (optional)
-Something Green to use for the stem (I used a piece of the kid craft foam shapes)
-Pencil
-Black fine-tip Permanet Marker
-Craft Glue


How to:
-The first thing you need to do is paint the bottle caps.

Photobucket


-After they dried. I sketched some different pumpkin faces on a piece of paper to get an idea of what I wanted it to look like.
-Then I used my pencil to lightly draw the face on the bottle cap.

Photobucket

-Next I traced over my pencil lines and filled in the face with the permanet marker.

Photobucket

-After that I cut a little piece of wire and twisted it around the tip of the pencil.
-Then I cut out my green stem (which can be any shape you want).
-I glued both of them to the under side of the cap.

Photobucket


-I then traced the magnet on to the cardboard and cut it out.
-Next comes glueing the carboard to the underside of the bottle cap. I did this to make the magnet level with the edge of the bottle cap.

Photobucket


-After that, glue the magnet on.

Photobucket


After it dries, you have some cute little magnets to add some spooky-ness to your fridge!

Photobucket

Saturday, October 2, 2010

Toilet Paper Pumpkin

Just For Fun

You'll find this a fun and easy way to start decorating for fall!

What you'll need:
-18x18 inch piece of fabric
-14x14 inch piece of quit batting
-Green felt
-Brown paper lunch bag

The how to:
-Place fabric right side down with batting centered on top. Place one toilet paper roll in center of batting. Wrap fabric around the toilet paper roll by stuffing the corners down the center of the roll.

-Next cut leaf shapes with long stems out of the green felt. (Using a plastic leaf or real leaf as a templet if needed) Stuff the leaf stems down the center of the tube.

-For the pumpkin stem roll up the brown paper lunch bag, starting from the short end and twist it. Stuff the stem down the center of the tube.