We are happy to share our photos and tutorials with anyone interested in spotlighting our crafts. Please be sure to link to our original posts and give us credit for our work. Thank you for your consideration and respect. We hope you enjoy our blog!


Friday, November 19, 2010

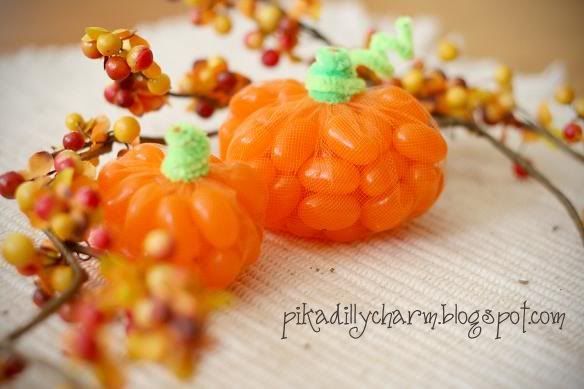
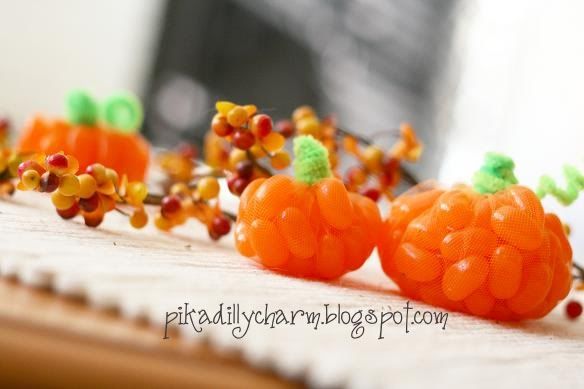
Jellybean pumpkins

Food Friday

A yummy and cute decoration.

Photobucket

What You'll Need:
- Orange netting or Tulle
- Scissors
- Orange jellybeans
- Green Pipe cleaners
- Different sized bowls to trace
- Marker

The How To:
-First use the marker to trace the bowl onto the orange tulle. My bowls were approximately 5 inches and the other one 8 inches in diameter.

- Then cut out the circles.

- Put some jellybeans on to the tulle and then pull the edges of the tulle up around the jelly beans (so it is like they are in a bag)

- Next wrap the pipe cleaner around the edges of the top of your tulle 'bag.'

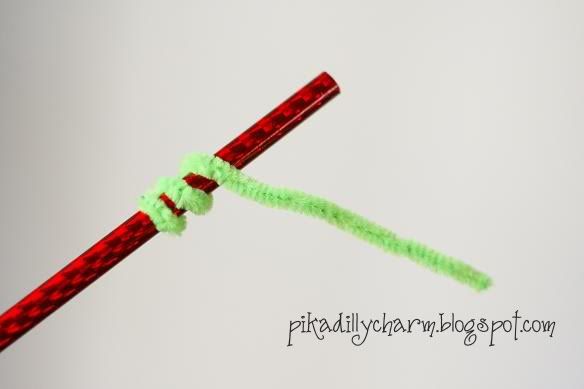
-Then, if you wanted to, you can take another pipe cleaner and wrap it around a pen or pencil to make a twirly tendril to come off the top of your pumpkin.

Photobucket

- After you wrap the pipe cleaner around the pencil, slide it off and wrap part of it around the stem of your pumpkin. Leave the other part of the twirl to stick off to the side of the stem.

Photobucket

These make a cute (and tasty) centerpiece for the kids table at Thanksgiving or just a fun treat to put in their lunchboxes.

Thursday, November 18, 2010

Pumpkin Patch

Love it.

Another cute project that I fell in love with.

Photobucket

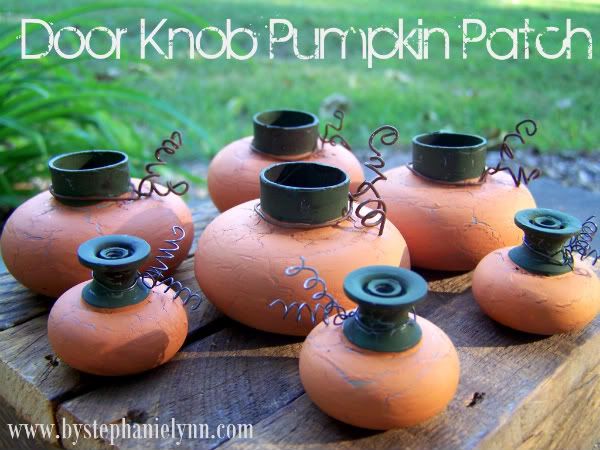
The other day I ran across these fun pumpkins that are made out of doorknobs.
You can find instructions on how to make them over at Under the Table and Dreaming by Stephanie Lynn.

Wednesday, November 17, 2010

Garland of Gratitude

Living Green


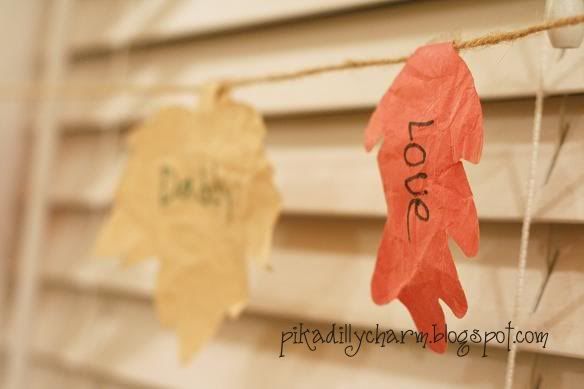
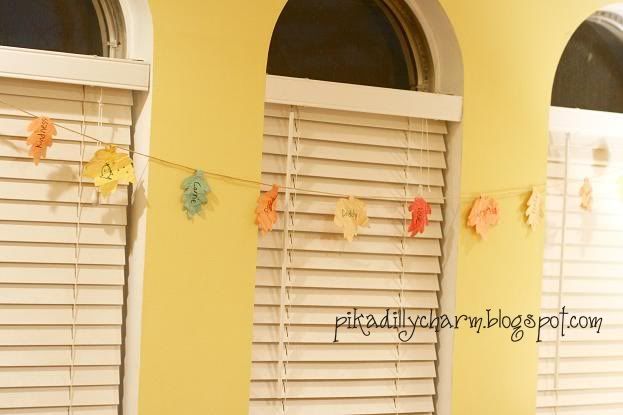
Here is a great way to remind your family what they are grateful for.

Photobucket

What You'll Need:
- Construction Paper (in fall colors)
- Leaf Template to Trace (I searched for a free one on the internet)
- Twine
- Tape
- Scissors
- Pen or Marker


The How To:
-First trace your leaf pattern on to your construction paper.

-Then cut them all out.

- Next crumple up all the leaves to give them a worn look.

- Now have each person in your family come up with at least one thing to be thankful for and have them write it on their leaf.

- To hang the leaves, fold the stem of the leaf over the twine and tape the stem to the back of the leaf.

Photobucket

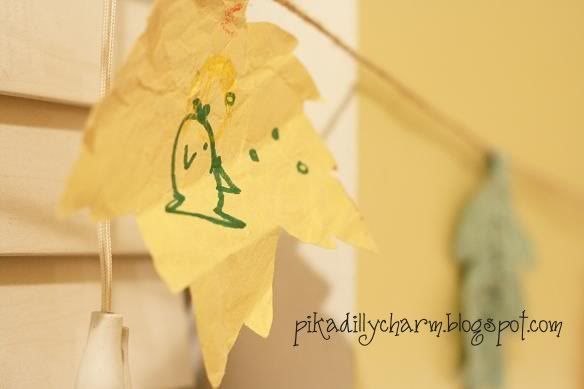
- If you have children who are not old enought to write on their own, you can have them draw a picture on theirs instead.

Photobucket

This is a great way to help everyone to have an attitude of gratitude.

Tuesday, November 16, 2010

Felt Mushrooms

Just For Fun

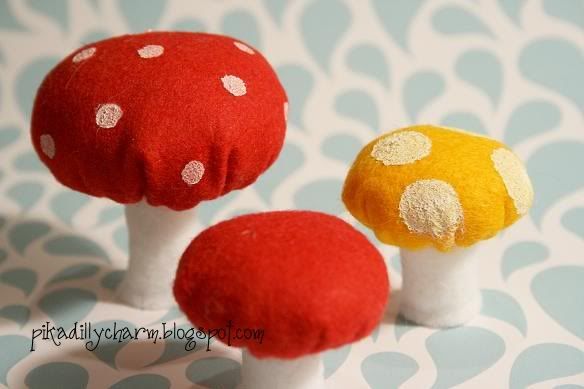
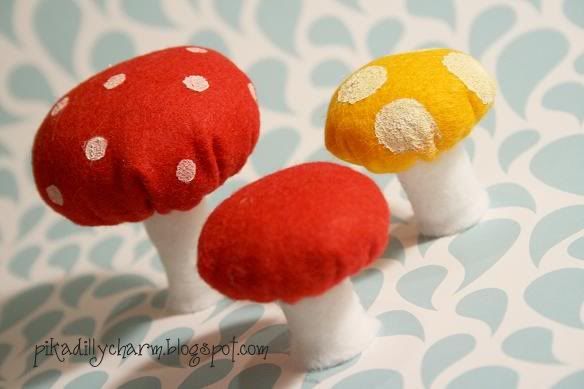
I just fell in love with these cute felt mushrooms.
Photobucket


What You'll Need:
-Felt
-Glue gun
-Needle and Thread
-Batting
-Marker
-Cup or Bowl to Trace (optional)
-Cardboard
-Acrylic Paint (optional)
-Paintbrush (optional)


The How To:
-Before we get into the details of making it, I wanted to give the size of the felt that I cut out. These can be any size you want, but just so you get an idea of how big they will turn out I wanted to let you know how big I made mine. The biggest one has a stem that I cut 4 1/2 x 2 1/2 inches. The diameter of the circle was 4 1/2 inches. And the cardboard used inside the mushroom top was 1 1/4 inches in diameter.


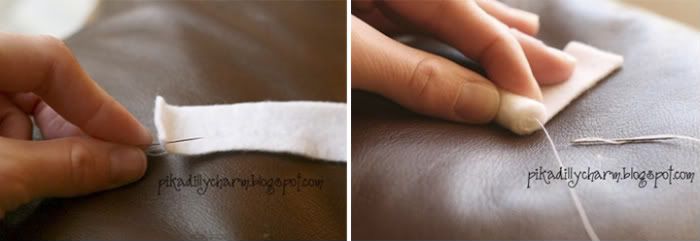
-First cut a strip of felt for the stem. I used white.

-I then threaded my needle and tied a not in one end of the thread.

- Next pull the needle through one corner on the stem. This will be on the bottom of the stem.

-Now, starting with the end with the thread in it, tightly roll up the strip of felt. Be sure to keep the rest of the thread out side of the roll while doing this.
Photobucket

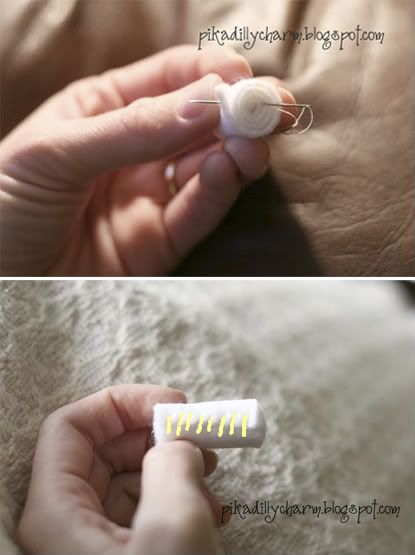
-After it is all rolled up, inseret the needle into the middle of the roll and out onto the side with the edge of the felt. (see picture below)

-Then use a whip stitch all the way down the side to secure the edge of the felt down. When you get to the last stitch on the stem, reinsert the needle into the felt and come out the middle of that end (just the opposite of the way you started stitching the stem).
Photobucket

-Next comes the top of the mushroom top. I used different sized bowls and cups to trace circles on to my other color of felt.
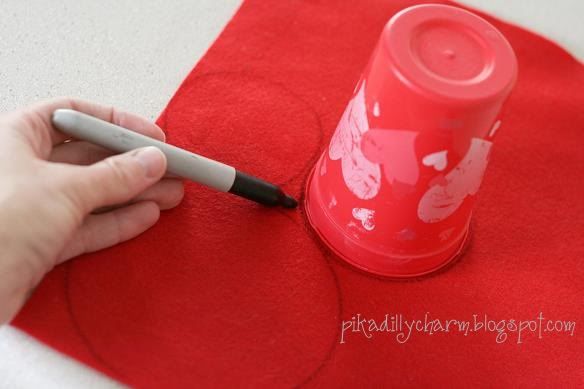
Photobucket

-Then I used my needle and thread to stitch loosely around the outter edge of my circle. And then I cut them out.
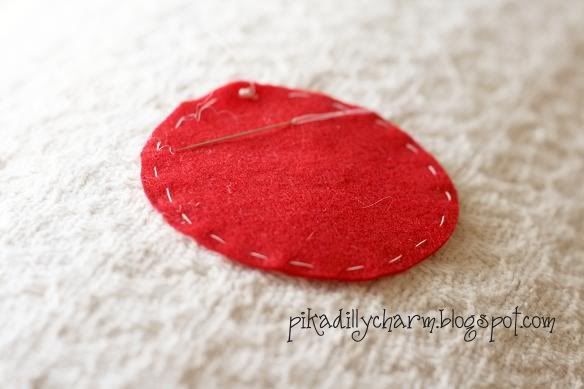
Photobucket

- When I stitched all the way around, I pulled the thread to cinch/pull the mushroom into a ball shape. Don't pull it all the way closed and don't tie the thread off yet.

- Next, stuff the top of the mushroom with the batting.

-Then, take your little cardboard circle and put it in the top.
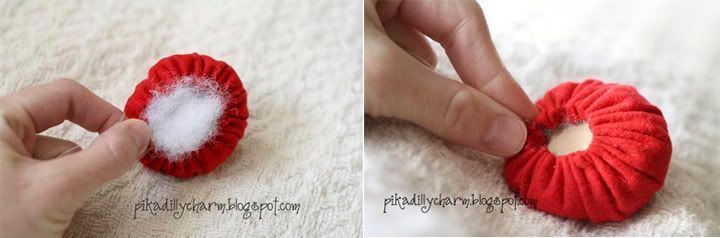
Photobucket

-Now you can pull the thread tight. But don't tie it off until you have made sure that the opening of it is just a little bit smaller than the width of your stem.

- After you have made sure the stem fits, tie off your thread

- Next use your glue gun and put glue on the card board. Then stick your stem in the opening and onto the glue.

-I found that my mushroom had a little bit of trouble standing on its own, so I gently used my fingers to pinch/stretch the bottom out a little bit and that seemed to solve the problem.
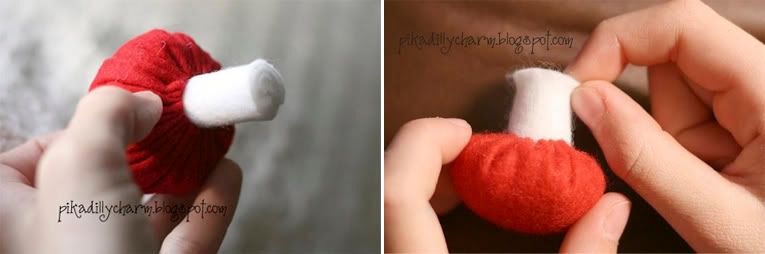
Photobucket

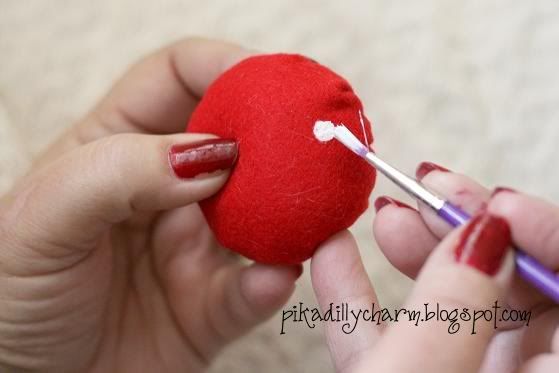
-Then I used my paint and paint brush to add white circle to my mushroom top.
Photobucket


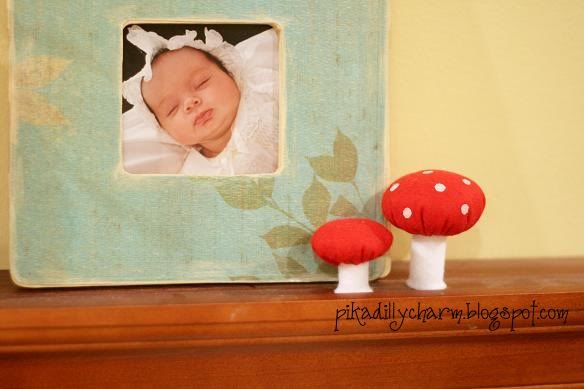
And there you have it!

Photobucket

A cute mushroom that can be used as a cute accent to a room or a great toy that my girls will love using with their fairy dolls.
Photobucket

Monday, November 15, 2010

Fall Alphabet

For the Family

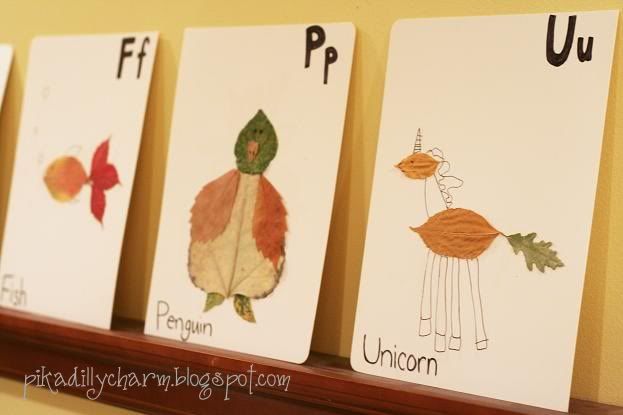
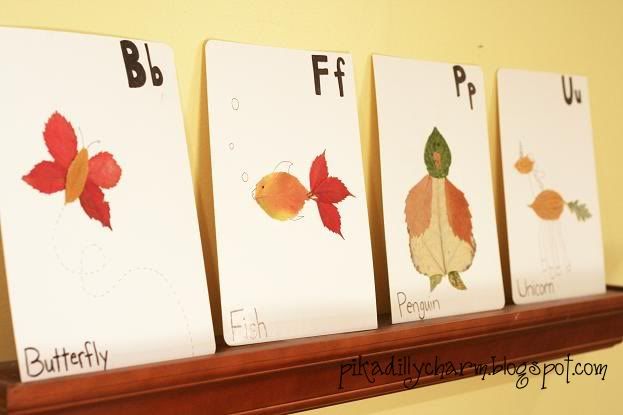
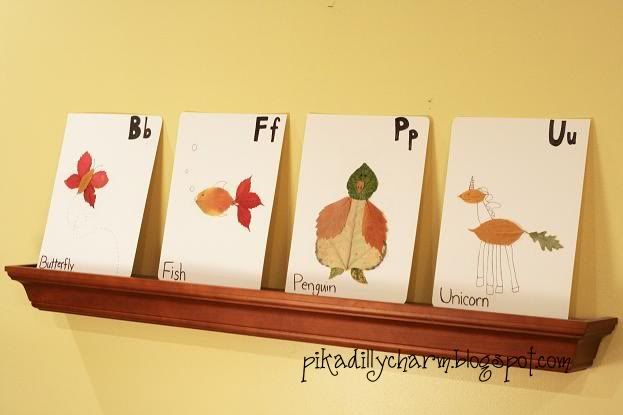
Another great way to put those fall leaves to use....a leaf alphabet.

Photobucket

What You'll Need:
- White card stock or other stiff paper
-Glue
-Pressed leaves
-Black marker


The How to:
-Start by giving everyone a piece of card stock.
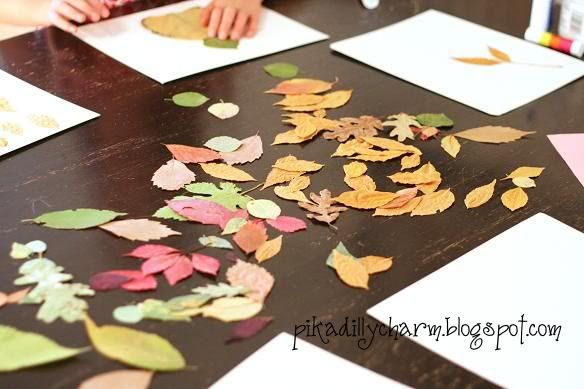
-Then spread your pressed fall leaves out on the table so you can see the shapes and colors of them.

Photobucket

-Next brainstorm about different things that start with the letters of the alphabet.

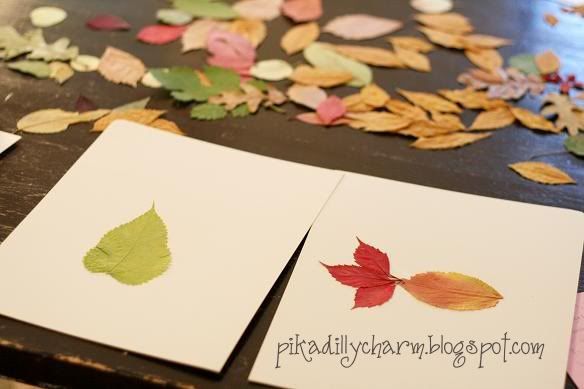
-After you have come up with a few different things, start piecing your ideas together on you paper.

Photobucket

- Then glue them into place when you are happy with what you have come up with.

-Next add details to your pictures. Eyes or mouth on the animals, etc.

-Finally you can add the letter of the alphabet that the picture represents or you can create a whole scene made out of leaf creatures.

Photobucket

Photobucket

Saturday, November 13, 2010

Fall Leaf Hanger

So Simple
Here's a fun finger painting craft your children will love helping you make.


What you'll need:
-White Poster Board
-Red, Yellow and Green Finger Paints
-Raffia
-Stick
-Leaf Stencil

The how to:
-Drip the finger paint in different places all over the white poster board and have your
children spread it around with their fingers.

-Let it dry and then do the same thing to the other side.


Once the paint is dry take your leaf stencil and trace it onto the board.
(I used a leaf cookie cutter as a stencil.) Trace nine leafs.


-Cut out the leaves and punch holes in the tops and bottoms of each leave
except for the bottom row. (punch only one hole in the top of the leave)

-Use the raffia to tie the leaves together. (Three rows of three leaves.)
Then tie each row to the stick.


-Tie the raffia to each end of the stick to make the hanger.

For some personal charm, add some some pictures to each leaf.

Friday, November 12, 2010

Fall Leaf Cinnamon Crisps


What you'll need:
-Leaf Cookie Cutters (Metal cookie cutters work best)
-Flour Tortillas
-1 tsp. Cinnamon
-2 Tbs. Sugar
-6 Tbs. Butter (Melted)

The how to:
-Preheat the oven to 400 degrees.

-Cut leaf shapes out of the flour tortillas using leaf shaped cookie cutters. (I found that metal cookie cutters cut work best.)


-Melt the 6 Tbs. butter in a bowl and mix the 1 tsp. cinnamon and 2 Tbs. sugar in another bowl.

-Brush the tortilla leaves with butter and then dip them in the cinnamon sugar mixture.


-Lay them on a cookie sheet (Not overlapping) and bake in the oven for 4-6 minutes or until crisp.


These sweet crisps are great with some sliced strawberries or fruit salsa on top!

Thursday, November 11, 2010

Thankful Banner

This Thankful Banner will help keep the feeling of 'Fall' this Thanksgiving!


What you'll need:
-Scrapbook Paper (Your choice)
Two - 8.5 x 11 (Printer size) (Mine is cream)
Two - 12 x 12 (Mine is Brown)
Four - 12 x 12 (Mine is leaf pattern)
-Glue
-Glitter
-Scissors or Paper Cutter
-Hole Punch
-Raffia
-Fall Leaves (Real or Fake)

The how to:

-Place your 8.5 x 11 Scrapbook paper in your printer and print out each letter.
Then cut into squares.


-Glue Letters onto second pattern paper and cut, leaving a 1/4 inch border around each letter.


-Glue each letter onto third pattern paper and cut, leaving at least a 1-2 inch. border.

-Once all backgrounds are cut out and glued together, trace each letter with a glue bottle
and fill in the center.


-Sprinkle glitter over glue and set aside to dry.


-Once letters are dry, punch holes in the top corners of each letter then punch holes about 1/4 inch. below the stem on each leaf.
(Leaves are coated with Mod Podge)


-Tie the corners and leafs together with Raffia.


-Once all the letters are tied together make loops for the ends and hang it up!

Wednesday, November 10, 2010

Fall Leaf Votive

Living Green

Here's a beautiful way to display your pressed fall leaves.


What you'll need:
-Glass Jar
-Fall Leaves
-Ribbon (Your choice)
-Mod Podge
-Glitter (optional)
-Paint Brush
-Wax Paper

The how to:

-Gather together your pressed fall leaves and a jar. (Mason jars work great!)


(Add a little glitter to your Mod Podge if you like)
-To start, paint the back of your fall leaves and a spot on your jar with Mod Podge. Paint 3 or 4 leaves at a time to give them time to absorb the moisture of the Mod Podge.


-Press your leaves onto the jar and paint Mod Podge over the top of them. Don't worry if your leaves are stiff and don't want to wrap around the jar at first. As the Mod Podge sits on the leaf it will gradually start to soften, allowing it to bend... but you will come across a few leaves that just don't want to bend. Not to worry. Just leave the leaf alone for a while and as the Mod Podge starts to dry it becomes tacky and sticky which will help when pressing the leaf around the jar.

-It's up to you how to place your leave on the jar. You can put a lot of leaves on and overlap them or only put a few on and space them out.


-Once all your leaves are on your jar, check to make sure there is a layer of Mod Podge over the whole jar. This will give it a nice uniform look.
*(Do not paint the Mod Podge over the lip of the jar or the base of the jar.)

-As you wait for the Mod Podge to dry, periodically check to see if any leaves are pulling away from the jar. If so press them back down. Continue to check until your satisfied with how the leaves are sticking.

-Once it's completely dry tie a ribbon around it and place a tea light candle inside.


Enjoy the warm glow of your beautiful Fall Leaf Votive!

Tuesday, November 9, 2010

Glitter Pumpkins

This is an easy craft that will add a little sparkle to your holiday!

What you'll need:
-Mini pumpkin. (fake or real- mine are fake)
-Glitter (Your color choice)
-Mod Podge
-Paint brush


The how to:
-Pick your pumpkin.


-Paint a thick coat of Mod Podge all over your pumpkin.


-Place a paper plate or bowl under your pumpkin and pour glitter all over it. Fill in all white spots.


-Place pumpkin on wax paper and allow to dry.

-Touch up the bottom of pumpkin and any other exposed areas if needed.

-Once dry add a second coat of Mod Podge over the top of the glitter on the entire pumpkin.
This will dry clear and ensure the glitter will not flake off.


-Once Mod Podge is dry your pumpkins are ready to display!

Monday, November 8, 2010

Pilgrim Hats

For The Family

Here's a cute little treat that's fun to make and sweet to eat!


What you'll need:
-Marshmallows
-Chocolate Almond Bark
-Chocolate Striped Shortbread Cookies
-Yellow Frosting

The how to:
-Melt 3-4 squares of chocolate Almond Bark in the microwave safe bowl. Stiring every 30 seconds until nice and smooth.

-Using a fork dip the marshmallow into the chocolate and cover completely. Tap the fork against the side of the bowl to knock of any excess chocolate.

-Slide the marshmallow of the fork with a toothpick onto an upside down chocolate striped shortbread cookie.

-Use the toothpick to fill in the exposed marshmallow where the fork came out.

-Once the chocolate has hardened pipe a yellow square buckle at the base of each of the chocolate covered marshmallows. That's it, your done!


Make them for your children to take to school or set them on the dinner table for Thanksgiving!