We are happy to share our photos and tutorials with anyone interested in spotlighting our crafts. Please be sure to link to our original posts and give us credit for our work. Thank you for your consideration and respect. We hope you enjoy our blog!


Wednesday, December 15, 2010

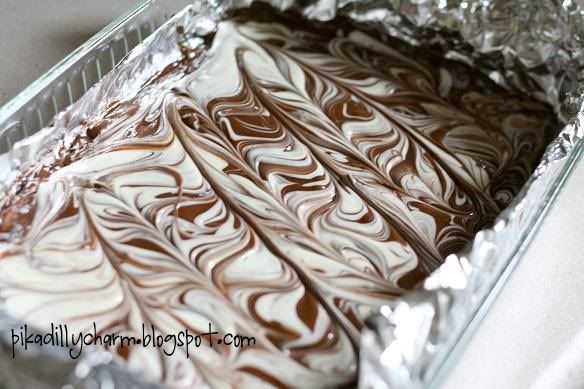
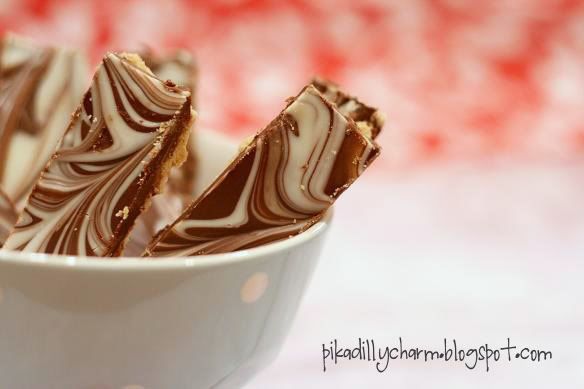
Chocolatey Treat

I love easy to make treats around the holidays. You'll love this chocolate and peanut butter cookie bar just as much as my kids do.

Photobucket

What You'll Need:

- 9x13 pan

-Tin foil

- About 8 Graham Crackers (broken in half)

- 6 Squares of semi-sweet baking chocolates

- 3/4 Cup Peanut Butter

- 4 oz (or 4 squares) of white baking chocolate

The How To:

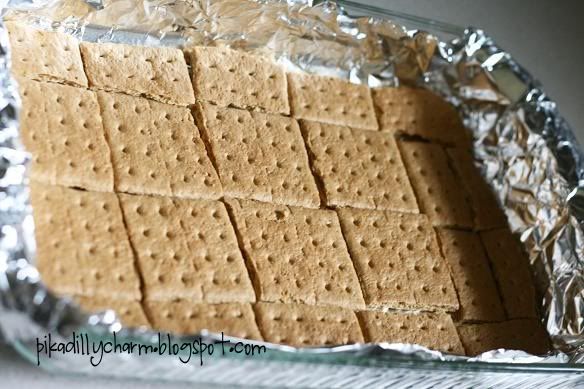
- First line your pan with tin foil.

Then arrange the graham crackers to they cover the bottom of the pan. You may need to cut a curved corner on the pieces that fit in the corner of your pan.
Photobucket

- Next, put your semi sweet sqaures and your peanut butter in a microwave safe bowl. Microwave on high for 1 to 2 minutes....be sure to STIR your chocolate/peanut butter every 30 seconds until it is melted.

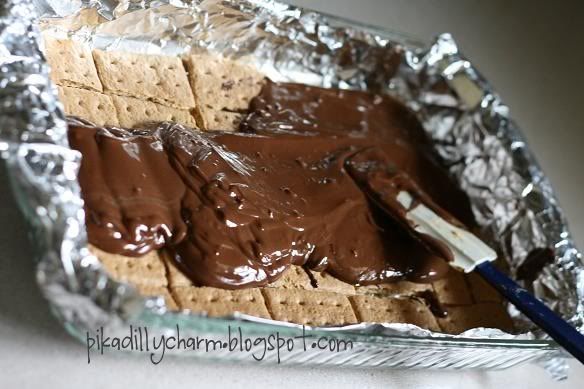
- Then pour it over the graham crackers and spread so it covers all of the crackers.
Photobucket

- Now, melt the white chocolate the same way. Being sure to stir every 30 seconds until melted.

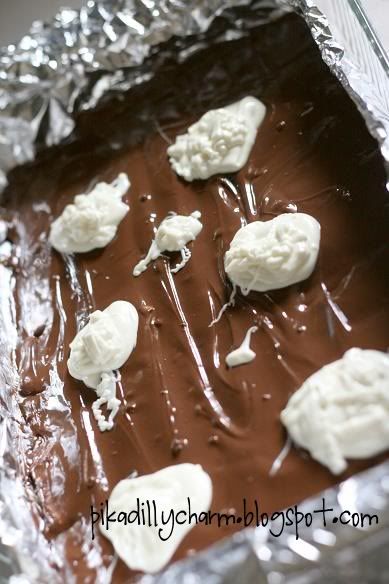
-Drop spoonfuls of the white chocolate into the pan.
Photobucket

- Use a knife and drag it through the white chocolate to swirl it with the semi-sweet chocolate. If you swirl too much it will just turn muddy looking.

Photobucket

- Now stick it in the refridgerator for an hour or so until it is firm.

-When it is firm, hold the tin foil and lift it out of the pan. Then peel the tin foil off of the treat.

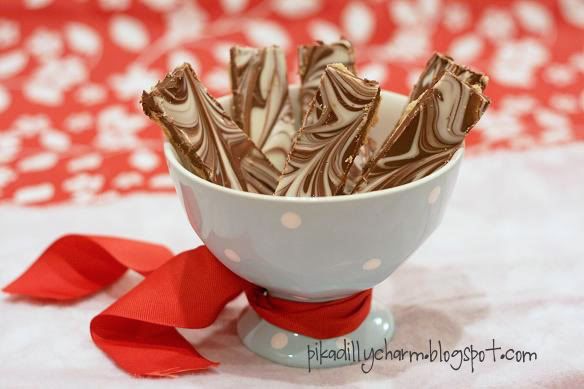
-Next, use a knife to cut it into bars. And serve and enjoy!
Photobucket

Monday, December 13, 2010

Window Decorations

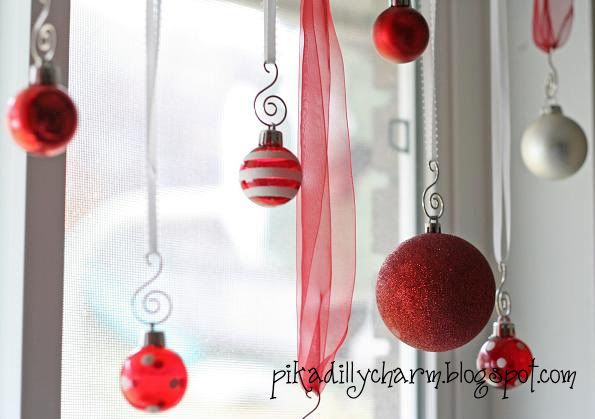
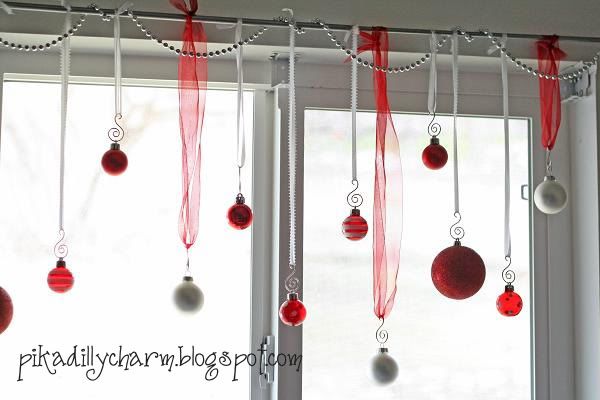
This is such an easy and beautiful way to add some holiday cheer to your windows.

Photobucket

What You'll Need:

- Ribbon (2 or 3 in different colors, textures, and/or widths)

- Ornaments of various sizes

- Existing window with a curtain rod in it.

- Fun ornament hooks (optional)

- Strand of Beads (optional)


The How To:

- First cut various lengths of the different ribbon.....one for each ornament.

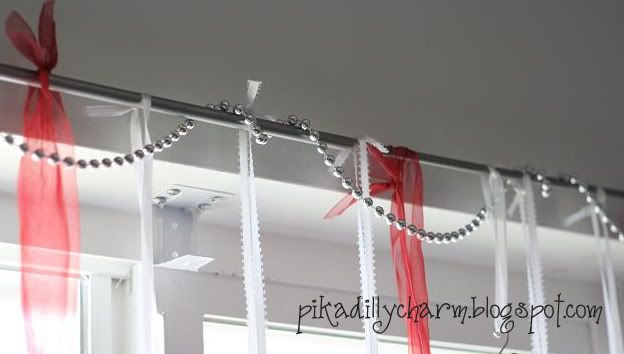
- Tie them onto an existing curtain rod. Be sure to mix the different lengths and color of the ribbons around as you tie them on.

**Note** If you are not using ornament hooks, you will need to string the ribbon through the ornament before you tie it on the curtain rod.

- Put a hook on the ornament and then hook it onto the ribbon. Again, mix the different sizes and colors of the ornaments up....so 2 of the same are not next to each other.

-For an added touch, I put a strand of beads on the curtain rod. Kind of twisting and draping it as I went.

Photobucket


And here's the finished product. Very simple to do and it used things that I already had on hand around the house.

Photobucket

Friday, December 10, 2010

Ribbon Wreath

 This wreath is beautiful and simple to make.
 
What you'll need:
-Three Spools of Wire Ribbon (all the same color or three different colors.  8 yards each, 24 yards total)
-12" medal ring

The how to:
-Tie the ribbon onto the ring, alternating colors as you go.  Tie each bow before cutting it off the spool. You will tie about 36 bows.


-Once all bows are tied on, evenly space them around the ring and reshape the ribbons. Pull them forward until it has a nice full look.   Trim any long pieces or strings.

Wednesday, December 8, 2010

Hand Print Snowman Ornament

Here's a fun activity for the family or a school Christmas Project!


What you'll need:
-Blue plastic ornaments (Or any color you choose)
-White Paint
-Colored Sharpie Markers (Your choice)

The how to:
-Paint your Child's hand with the white paint.
-Slowly wrap your their hand around the bottom of the ornament. Making sure all the fingers touch the ornament. Or you'll end up with a floating snowman head like mine.
-Hang up to dry.
-When dry use the colored Sharpie markers to draw the hat, scarf, face, arms and buttons on the snowman.

And there you have it!  
A sweet keepsake ornament your Child will look forward to placing on the tree each year!

Monday, December 6, 2010

Service Tree

About this time of year my Children start to pepper me with all the stuff that they want.  But this Holiday Season I wanted my Children to focus on giving and serving others
  instead of thinking about themselves so much.  Here is an idea that has helped our family.

What you'll need:  
-Clear container of some sort. (Mine is a glass Christmas Tree.)
-Pom pom balls. (Or what ever you choose to fill it with)

What to do:
-Every time your child does a service or is kind to someone else, let them choose a Pom pom to place inside the container.

-Explain to your child that each Pom pom ball represents a gift they are giving to Jesus.  When they are kind and serve others it is as if we are doing it to Jesus. 

-Help your Children learn to look for ways to serve others. Help your Child make the bed of their Brother or Sister and leave a paper heart on their pillow with an 'I Love You' on it. (Make a bunch of paper hearts with I love you on them in advance) Help them see that service,(especially secret service) is fun and will make them, the other person and Jesus happy.   Encourage them to fill the container to the top by Christmas Day! 

-On Christmas Day, before anyone opens any presents, show the whole family how full the container is and praise them for their kindness and service to others.  Express the feelings that Jesus has when we are kind and serve others.

-Now the above ideas a defiantly geared toward younger children. Now if you have teenagers , try filling it with candy or money.  Then pick a family to take it too.  With a note, leave it on their doorstep Christmas morning!  knock and run! 

 I hope this activity helps to make your Christmas Holiday a happier one.

-

Saturday, December 4, 2010

Friday, December 3, 2010

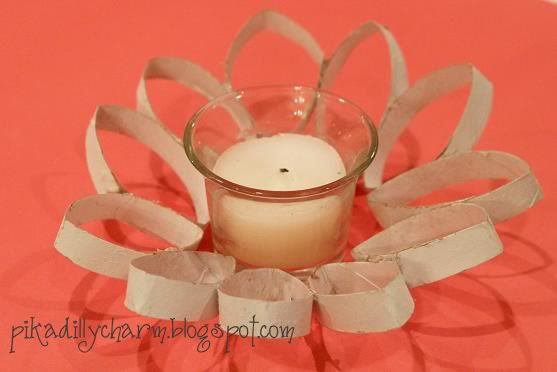
Cardboard Flower

Living Green


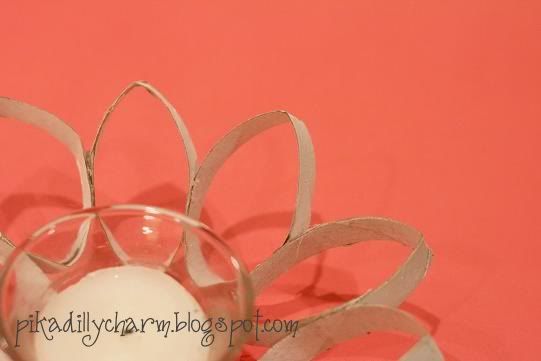
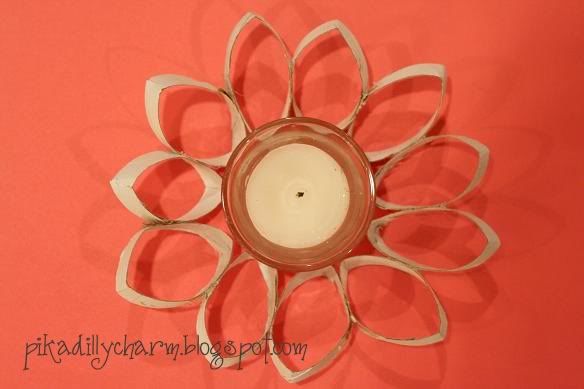
If you have any of the empty paper towel tubes, heres a great way to make something cute with them.

Photobucket

What You'll Need:
-Empty paper towel tube

-Scissors

-Spray Paint (optional)

-Candle

-Hot Glue Gun


The How To:
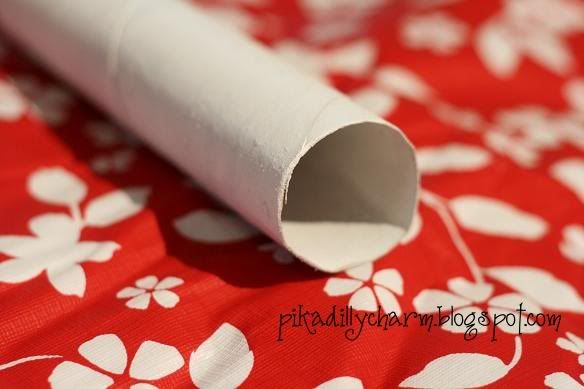
- Take your empty paper towel roll and spray paint it whatever color you want. I did mine white and I sprayed the inside of it white as well.

Photobucket

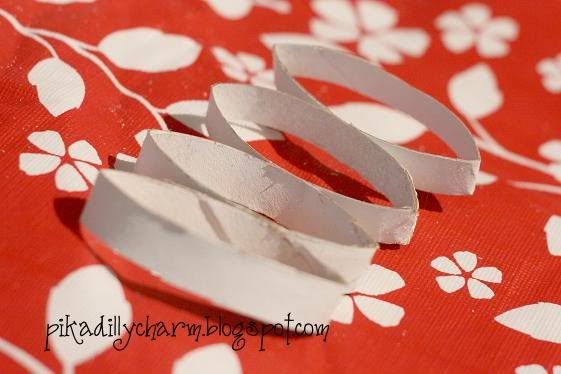
- Next cut it into 1/2 inch thick pieces.

Photobucket

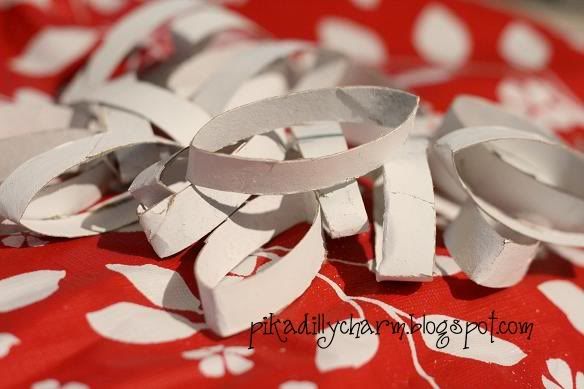
- Then, using the hot glue gun, glue them together. I put a dot of glue on the center of the inside edge of each piece. This is to help it curve or slant around into a circle.

Photobucket

- As you glue them together be sure to check every once in a while to see if it is shaping right around your candle. Be sure to check and make sure that the cardboard tube is NOT going to be too close to the flame of the candle...wouldn't want anyone to start a house fire. =/

Photobucket


And, wa-la, you have a cute little way to spice up your candles.


Photobucket

Wednesday, December 1, 2010

Easy to make Flower.

Since I have 3 girls, I love to make flowers for them. Here is a quick flower that is a great accessory...even for adults.

Photobucket

What You'll Need:
-Fabric (scraps of fabric work great)

-Scissors

-Thread and needle (or sewing machine)

-Hot Glue Gun

-Ribbon scraps

-Barrett or Gatorclip

-Embelishments (Buttons, tulle/netting, feathers, etc.)


The How To:
-First cut a strip of fabric 2 inches wide by 16 inches long. This will give you a fairly large flower. For smaller ones, just decrease the width by 1/2 to 1 inch and the length by 3 inches or so.

Photobucket

-Next tie a knot in your thread and then do a loose basting stitch down one side of the length of the strip of fabric.

Photobucket

-After that, push the fabric down to the knotted end of the thread so the fabric bunches together.Photobucket

-Then stitch the ends of the fabric together so the fabric makes a full circle. And finish by tieing a knot in the end of the thread.

Photobucket

As you can see, this type of flower has a ruff/raw unfinished edge. If you don't like that look you could always hem the outside edge before you gather up the fabric.


Photobucket

-To make it into a barrett cut a little piece of fabric about 2 times the length of the gator clip.

-Put hotglue on the ribbon and then place the clip on it as shown in the pictures below.

Photobucket

- Before we glue the barrett on, lets put the embellishments on first.

- The pictures below show a few different ways you can add things to your flower. Everything is just hotglued on.

Photobucket

- After you embellish your flower, then on the underside of it, hotglue your ribbon-covered barrett/gator clip to it.

Photobucket

Not only can it be worn in the hair, but you can also add it to your clothes. (Note- You could replace the barrett on it with a jewelery/broche pin)

Photobucket

On this last picture I glued small flowers right onto the ribbon. If you don't want to glue it on, use the gator clip and just clip it right onto the ribbon.

Photobucket

Monday, November 29, 2010

Winter Stars

Just For Fun

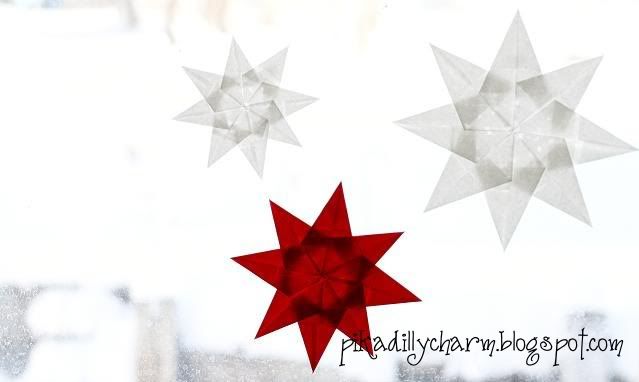
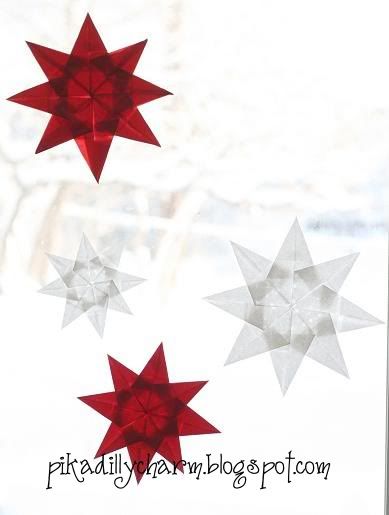
Here is something other than snowflakes to decorate with during the winter months.

Photobucket

What You'll Need:
- Tissue Paper
- Glue
- Scissors
- Tape
- Ruler

The How To:
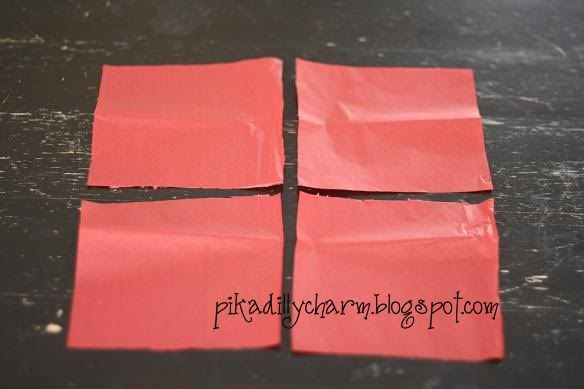
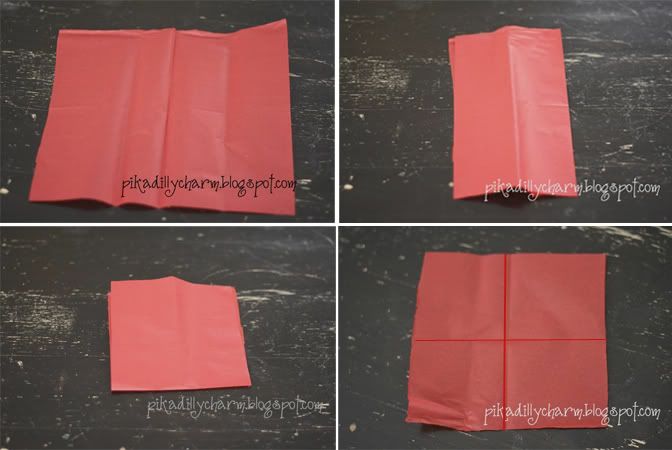
-First, cut a squre out of tissue paper (For my large star I cut a 10x10 inch square, Medium star: 8x8, Small star: 6x6)

-Next, cut your square into 4 smaller squares. (You will need a total of 8 these smaller squares for one star)

Photobucket

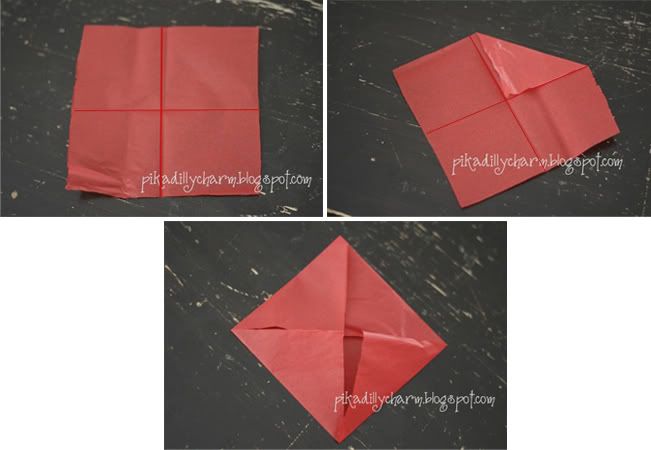
-Then, take one of the smaller squares and fold it in half. And then fold it in half again (so you have a smaller square).

-Unfold it and you should have a square with fold marks on it ( these will be a guide in the next step).

Photobucket

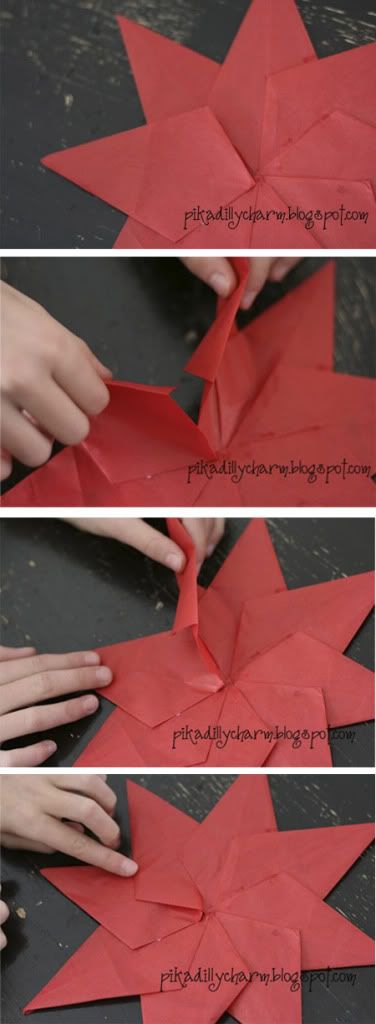
- Now, fold each corner to the center of the square. Use the fold lines from the previous step as a guide as to where to fold the corner to.


Photobucket


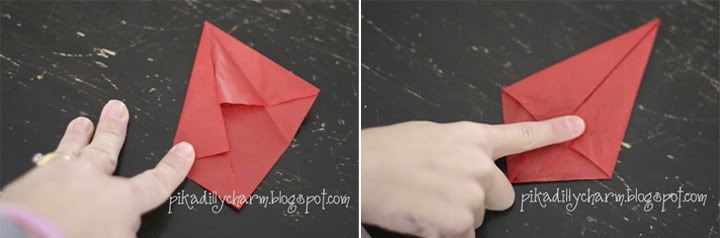
-Then, lay your square in front of you so it looks like a diamond.

-Next, fold the point/corner on the left to the center fold to form a point and the top.

-Then do this with the point on the right also.

-Now your paper should remind you of a kite.

-Do this with the other 7 small squares.

Photobucket

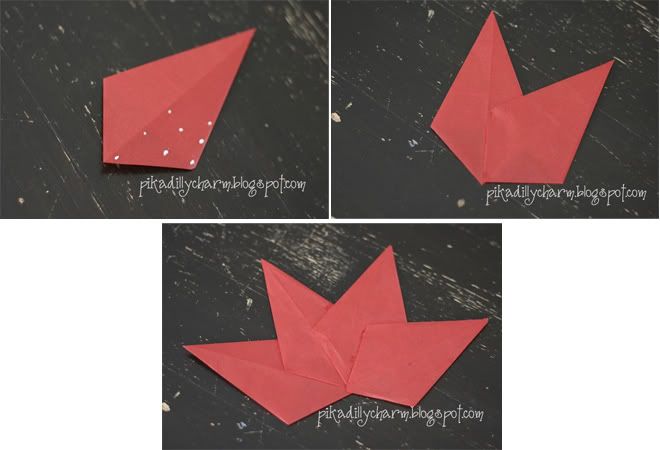
-Now comes the time to glue them together.

-Put several drops of glue on half of one side of the back of your point (the side that is smooth and doesn't have all the folded pieces).

-Then, place one of the other points onto this one as shown in the picture. Making sure that the end points overlap each other.

-Continue to do this until you come to the last point of your star.

Photobucket

-Now instead of just laying this last point on top of the others, you want it to blend in with the rest of the star.

-So, to do this lift up the edge of the last point that is not glued down and the edge of your first point that is not glued down.

-Push the edge of your last point down/under the first point.

-Then put drops of glue on your last point and glue the first point on top of it. (see illustrations below)

Photobucket

And there you have it!

My kids love the design that you can see through the paper when they are hung on the window

Photobucket

Friday, November 26, 2010

Home Made Turkey Noodle Soup

This is a great recipe to for a cold day and to help use up that leftover turkey.


 What you'll need:
-10 Cups Water
-8  Chicken Bouillon Cubes
-2 Celery Stalks, Chopped
-2 Carrots, Sliced (1 can Carrots)
-Turkey
-8oz. Pasta
-Salt & Pepper to taste

The how to:
Bring Broth to a gentle boil.  Add turkey, carrots and celery, cook until veggies are slightly tender. Add noodles and cook until noodles, and veggies are tender.  Salt and pepper to taste.

Wednesday, November 24, 2010

Finger Print Turkey Place Cards

What you'll need:
-White card stock
-Yellow, Orange, Red & Brown Paint or Stamp pads
-Googly Eyes

The how to:
-First start with the color Yellow, dip your finger in the paint and press it repeatedly on the card stock making a fan.

-Next use the color Orange and press your print over half of the yellow print. Repeat with the color Red.

-With the brown press a print in the bottom center of the fan.

-Glue two googly eyes and a small orange triangle for the beak on the brown print.

-Draw the feet and add a name.

Monday, November 22, 2010

Braided Bread Napkin Rings

Here's a fresh idea for your napkin rings this Thanksgiving!


What you'll need:
-Cardboard tube (paper towel or toilet paper tubes)
-Tin Foil
-Bread dough (store bought or home made)
-Cooking Spray

The how to:

-Wrap your cardboard tubes in tin foil and spray with cooking spray.


-Take your dough and roll it into three long strips.
Pinch the ends together and start braiding it. Or two long strips and twist it.
(Make sure your strips are more on the thin side)


-Wrap your braid around your foil tube and pinch the ends together.


-Place the braids on a greased cookie sheet, pinched side down. Cover and let raise for 30 minutes to one hour. Don't let them rise too much. Then bake in the oven at 350 degrees for 15-20 minutes. Or until golden brown. (Check on them after 10 minutes)


-Once out of the oven spread butter on the rings while still hot. Then let them cool.


Gently slide the rings off the foil tubes and slide your napkin inside.
Enjoy!

Saturday, November 20, 2010

Thanksgiving Candy

So Simple


Here is an easy treat for the kids to help make.

Photobucket

What You'll Need:
-Oven
-Cookie Sheet
-Aluminum Foil
-Life Saver Hard Candy
-Green Fruit Leather


The How To:
-First heat the oven to 250.

-Then line your cookie sheet with aluminum foil.

-To make the Indian Corn, you need to break up several different colors of Life Savers.

-Then, make a pile of the pieces on the cookie sheet and shape them into a corn shape.

Photobucket

-Next put them it in the oven for 8-10 minutes.

-Take them out and let it cool.

- When it is cool, peel the aluminum foil off the bottom of the corn.

-Then cut 2 pieces off of your fruit leather to look like corn leaves/husks and place them on your corn.

Photobucket